DIY Car Service Kit- How to Do your Own Basic Car Service Yourself
DIY Car Service Kit- How to Do your Own Basic Car Service Yourself
Owning a car is expensive with the initial outlay of buying one then the ongoing costs of insurance, fuel and maintenance. It's recommended that a vehicle is serviced at least once a year to keep the mechanics in good working order, prolong its life and ensure key components are safe to operate.
In order to reduce costs, you can perform a basic car service yourself without any fancy equipment, rather than putting it into a professional garage that will charge for their labour and replacement parts.
As well as the financial advantage, servicing your own car means you know the job has been done thoroughly and quality components - such as decent oil - were used.
If you're going to perform a basic service on your car, you need to make sure you've got the right tools:
- Socket set (including a spark plug removal socket)
- Oil drain tray (you could use a bucket)
- Oil filter remover (either the three arm type or chain type)
- Wrench (possibly a torque wrench)
- Screwdrivers (possibly)
- Allen keys (possibly)
- Car jack
- Axle stands (you could use a set of ramps)
- Tyre pressure gauge
- Old rags
- Funnel (optional)
- Gloves (optional)
- Oil
Although these tools will represent a costly initial outlay, once you have them, you'll be able to use them for your servicing forever (and not just for your own car) - saving you a lot of money in the long run.
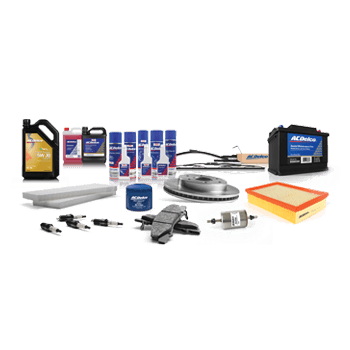
OTHER ITEMS NEEDED TO SERVICE A CAR
The objective of a service is to replace certain parts and fluids to keep the car running smoothly. As a result, you will also need to purchase these replacement components. To ensure you get the correct ones, check the car's manual.
- Oil
- Oil filter
- Spark plugs
- Air filter
- Anti-freeze
- Windscreen washer fluid
JOBS PERFORMED DURING A BASIC SERVICE
A basic service will be different from garage to garage, but they should all include:
- Oil change
- Spark plug change
- Air filter change
- Tyre pressure check
- Tyre condition check
- Fluid check
- OIL CHANGE
Steps for changing your oil
- Check the type and amount of oil needed.
- Get together your filter, wrenches, and other supplies.
- Prepare your vehicle.
- Locate the oil filter and drain plug.
- Drain the oil.
- Tighten the drain plug.
- Change the oil filter.
- Add the new oil.
Before you get under the car, the first thing to do is warm it up slightly by having a quick drive around the block or leave it idling for around five minutes. This will allow the oil to flow more freely, making it easier and quicker to drain.
Depending on the ground clearance of your car, it is possible to perform the oil change without it being raised up on ramps or axle stands. However, having it higher up on a level surface will make the job easier.
Once the car is in position using the jack or ramps, it's time to put the oil drain tray underneath the sump plug. Before undoing the sump plug, remove the oil cap from underneath the bonnet on the top side of the engine - having this in place can sometimes cause a vacuum when draining the oil.
The sump plug is actually just a bolt that's attached to the lowest part of the sump. Typically, they're either a 14mm bolt or an Allen bolt which can be undone with the socket wrench.
While the oil drains into the tray, take your oil filter remover tool, fix it onto the current oil filter and undo it in an anticlockwise direction. Usually, it takes around an hour for the engine to completely stop dripping oil; it isn't necessary to wait this long (a garage wouldn't), but if you have the time it makes sense to get as much of the old oil out as possible.
When you're ready, get the new oil filter and lightly wet the rubber seal with the new oil to give it a stronger seal and allow you to tighten it properly. Place it back in the same position as the old filter and first tighten by hand. To ensure it's properly sealed and not leaking oil, use the removal tool reversed to lightly tighten it further.
Before you put the sump plug back in, you can pour a bit of the new oil through the engine to flush out any of the remaining old oil. This step isn't necessary, so if you don't want to do it just replace the sump plug and take the car off the axle stands or ramp.
For added accuracy when putting new oil in the car you can use a funnel. Be sure to only add a little at a time and check the dipstick to ensure you don't overfill the engine. Once the oil level is just below the maximum marker, replace the oil cap and run the engine for around 10 minutes to allow oil to reach the necessary parts.
Turn the engine off and check the oil level again. Add more oil if the level has dipped below the middle marker on the dipstick.
After changing the oil it's important to dispose of it responsibly. The used engine oil must be stored in a sealed container and not mixed with any other substance - don't pour it down the drain or onto the ground.
SPARK PLUG CHANGE
Typically, manufacturers recommend that spark plugs are replaced every 45000kms to 50000kms (check your owner's manual to confirm for your car), so you might not need to perform a change with every basic service you do. If you don't replace your car's spark plugs in a timely way, you could be setting yourself up for engine problems such as misfiring, lack of proper acceleration and uneven idling.
If your car struggles to start, vibrates excessively while idling or has reduced fuel consumption, these are all signs that your spark plugs need replacing., Alternatively, you can do a visual check to see if there is any rust on the ends or cracks in the ceramic down the middle.
To find the spark plugs just follow the spark plug wires - usually, they're on either side of the engine. Remove the spark plug wires by pulling on the 'boot', not the actual wire itself, to reveal the spark plug.
Take the spark plug socket (you may need an extension) and place it in the gap left by the spark plug wire. Push it down onto the plug and break it loose from its holster by turning the socket anticlockwise and you should be able to loosen the spark plug the rest of the way by hand.
Get a new spark plug, place it in the spark plug socket and lower it into the gap. Make sure you only tighten it up by hand to begin with before using a wrench or torque wrench to tighten it up slightly. Put the spark plug wire back in place and repeat for the remaining plugs.
AIR FILTER CHANGE
Most cars are fitted with an airbox to cover the air filter. Normally, they're only held in place by a set of clips, but some are secured using screws, so you may need a screwdriver.
Once the airbox is unfastened, you can remove it to reveal the air filter which is most likely going to be black from all the trapped muck. Pull the old air filter out and replace it with the new, clean, white one.
Simply replace and fasten the airbox.
TYRE PRESSURE CHECK
When you're checking tyre pressure, it's always best for the tyres to be cold. To make sense of your car's tyre pressure rating, you first need to find the correct tyre pressure - normally, you can find them in your car's manual, inside the petrol cap or printed on the inside ledge of the driver's door. Alternatively, you can enter the registration number into the National Tyre Service website.
Attach the tyre pressure gauge to the valve of each tyre, record the reading and cross-reference it against the correct rating. If the pressure is too low you can buy an air pump to inflate the tyre at home or visit a petrol station. On the other hand, if the pressure is too high, allow some air to escape while the dust cap is off and recheck the pressure until it's correct.
Don't forget to check the spare tyre - you never know when you might need it.
TYRE CONDITION CHECK
As well as checking the tyre pressure, you should also note the tread depth and see if there is any visible damage such as bulges, cuts or any objects that have punctured the tyre wall.
In the UK, the minimum legal tread depth is 1.6mm (although it is recommended to change your tyres when they reach 3mm for added safety). You can easily see if your tyres have a legal tread depth using the 20p test.
If any of your tyres are below the legal limit or are visibly damaged, you should have them replaced immediately. This is a job you could do yourself, but in order to retain wheel alignment, is probably best undertaken by a professional with more advanced equipment.
FLUID CHECK
In addition to changing the oil, a basic service will include other fluid levels being checked and topped up including windscreen washer, anti-freeze/water, brake fluid, power steering fluid and engine coolant.
Using a torch, you can normally see the level of each of these fluids by lifting the relevant caps and looking inside the containers. If any of them look low, you can - and should - top them up.
FURTHER SERVICING WORK
Performing the jobs listed above will certainly save you money and give you a better understanding of how your car works; however, these are only basic checks that should be performed every year.
Most cars require a 'major service' every other year for a more in-depth check of the engine, steering controls, drive system, fuel system, electrics, brakes, exhaust and suspension which should be carried out by a professional mechanic.
Call our specialist to help you with questions on how to service your car or any parts you may need to get the job done right!
Australian Online Car Parts
02 4232 2181
southcoasthonlineparts@gmail.com
